Our UX methods
1.
Discover
Observations
Kick-off
UX Audit
Benchmarking
Assumption mapping
Research plan
Focus group
Card Sorting
Recruitment
User interviews
Uncovering essential insights about your users and their needs.
2.
Define
Feature mapping
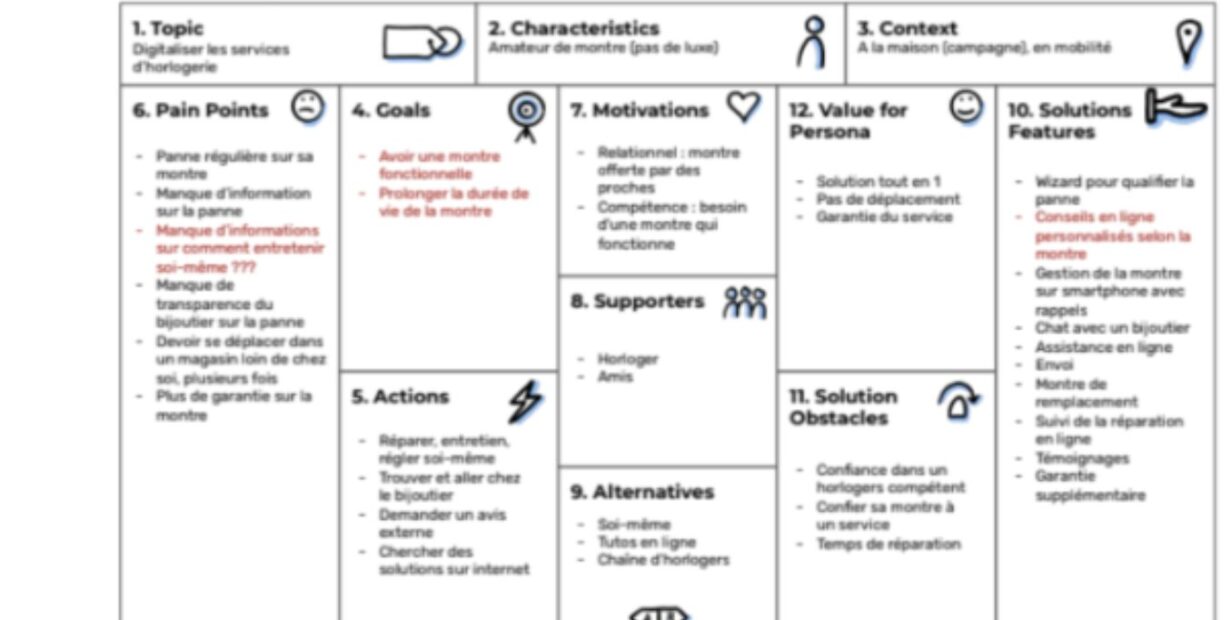
Personas
Customer Journey Mapping
User Flow Mapping
Ideation
Pinpoint actionable problems and set project goals to meet user needs
3.
Design & Test
Wireframe Process
6’up
Concept Mapping
Moderated Usability Testing
Design Critique
Ideation
Uncovering essential insights about your users and their needs.